Location
For optimum performance, look for a mounting location with the following attributes.
- South facing is best (SE to SW is OK)
- Unshaded or low shade all day, all year.
- At least 3 metres above highest shower head.An optional pressure booster pump may be needed if this cannot be achieved.
- Strong enough to support a weight of 220kg, 180 kg of which will be concentrated below where the tank will be .
If unsure, you can call us (preferably with photos indicating South)
Preparation
Before starting, please prepare with the following.
- Safety equipment (harness, gloves, hard hat, non slip shoes, drinking water, sunscreen).
- Tools. Small socket set, adjustable wrench, flat and phillips screwdriver, drill for mounting bolts. If using PP-R hot water pipe (recommended) you'll also need a PP-R joint welding tool.
- 2 people
- Materials. Thread tape, hot and cold water piping plus connectors, hot water shut off valve, cold water shut off valve, about 60 cm flexible hose for final cold water connection to the tank control valve, mounting bolts/ screws, a good PU sealant, pipe glue, dishwashing liquid, a bowl of water.
Step 1 Frame assembly
Frame has 2 configurations; with or without back legs. The back legs increase the inclination of the assembly when mounting on a flat roof. If mounting on a pitched roof, you will not need the back legs anywhere in Thailand. Your final inclination should result in tube inclination relative to horizontal to be about the same as the latitude of your location. Use the following general guide.
- Southern Thailand up to 13° North (Petchaburi/ Chonburi). No back legs needed either for pitched or flat roof.
- Bangkok and further North (13+° North). Use back legs on a flat roof only. No back legs needed on a pitched roof.
You can now start the frame assembly using the components in the long thin frame box. Since the frame is lightweight, you can do this assembly on the ground in the most convenient location.
- Refer to our You Tube frame assembly video.
- Lay out all the components in advance, paying close attention to tie bars and their lengths.
- Wear gloves as the frame edges can be sharp.
- Hand tighten nuts only. Frame should be free to flex at this point.
- Tank mounting brackets can be located in the tank box.
- We recommend you take a detailed video or photos of your frame assembly at this point and send to us for checking
- When we have approved your frame assembly, you can move it to your final mounting location, and secure it to that location using the included feet (4).
Step 2 Tank and tube assembly
- Remove nuts on tank bolts and align tank bolts with tank bracket slots, then lower tank onto mounts, and lightly tighten tank nuts, so tank is free to rorate
- Follow instructions on You Tube Final Assembly video.
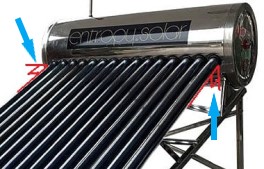
- When tubes have been installed, check they are aligned at exactly 90° to the tank diameter in all axes. See checklist below
- After checking tube alignment, all nuts can now be tightened.
Step 3 Peripherals and connections
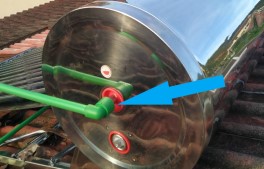
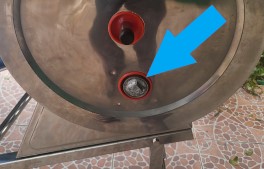
- Screw the control valve to the tank, ensuring the adjustment screw cap is at the top. See checklist below for correct orientation
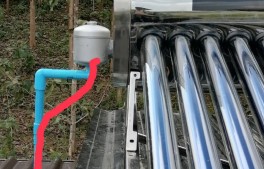
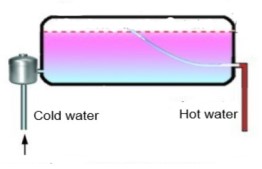
- Connect cold water input to base of the control valve.See checklist below for correct orientation. DO NOT TURN ON COLD WATER. We recommend you use flexible pipe for the final 60cm of cold water supply to the control valve and include a cold water shut off valve on the cold water supply line. See checklist below
- Connect hot water line to hot water output. We recommend PP-R pipe and a shut off valve near to tank output. See checklist below
- Screw breather tube to hole at the top of the tank
Step 4 Check and commission
- Tighten all nuts
- Check items in the checklist below
- Take a detailed video of the system showing all connections, tubes, frame and send to us BEFORE APPLYING COLD WATER . Your warranty will be invalidated if you apply cold water without our advance approval
- AFTER we have checked and given approval....Cover the tubes with a cloth and allow to cool for 30+ minutes, ensure hot water valve is closed, then slowly start adding water. Control valve should fill the tank to correct level. Look for leaks.
- Wait 1-2 hours for fill and solar heating. Then open hot water valve and check for hot water leaks and, then check flow.